
- Как установить компилятор gcc / g++ для Windows. Установка gcc
- 0. Прежде чем поставить компилятор GCC
- 1. Скачиваем установщик компилятора
- 2. Установка GCC
- 3. Проверка установки
- 4. Бонус. Компиляция программ с помощью GCC
- Что ещё за a.out? Непонятно!
- А Вы знаете, что мы пишем программы на C, C++, C#, Pascal и Python?
- Почему именно мы?
- Как с нами связаться?
- GCC worth using on Windows to replace MSVC?
- 7 Answers 7
- How to install the C language GCC compiler on Windows
- 1- What I want to teach you here
- Why using the gcc compiler?
- 2- How to use the gcc compiler?
- Step 1: Write your c code
- Step 2: Compile using gcc
- Step 3: Execute your code
- 2- The principle
- 3- Installing MSYS2 on your PC
- 4- Installing GCC and other development tools with the pacman package management system
- 5- Last Important Step: Add Executables to your Windows PATH
- Preshing on Programming
- 1. Install Cygwin
- 2. Install Required Cygwin Packages
- 3. Download, Build and Install the Latest GCC
- 4. Test the New Compiler
- Recent Posts
- Using GCC with MinGW
- Prerequisites
- Check your MinGW installation
- Create Hello World
- Add a source code file
- Add hello world source code
- Explore IntelliSense
- Build helloworld.cpp
- Running the build
- Modifying tasks.json
- Debug helloworld.cpp
- Start a debugging session
- Step through the code
- Set a watch
- C/C++ configurations
- Compiler path
Как установить компилятор gcc / g++ для Windows. Установка gcc
Время чтения: 5 минут
Для того, чтобы писать программы на C/C++ обычно достаточно установить какую-нибудь интерактивную среду разработки (IDE), например, Visual Studio или Eclipse, однако иногда (обычно в целях обучения студентов) требуется создавать программы в обыкновенном текстовом редакторе и компилировать приложение, используя консоль и компилятор gcc. В Unix системах он обычно установлен прямо «из коробки», а вот на Windows системах такой роскоши не наблюдается. Более того, у многих пользователей возникает множество проблем при установке компилятора. Поэтому нами было принято решение написать данную статью, чтобы помочь всем тем, кому пришлось или приходится мучаться с установкой этого компилятора на Windows.
0. Прежде чем поставить компилятор GCC
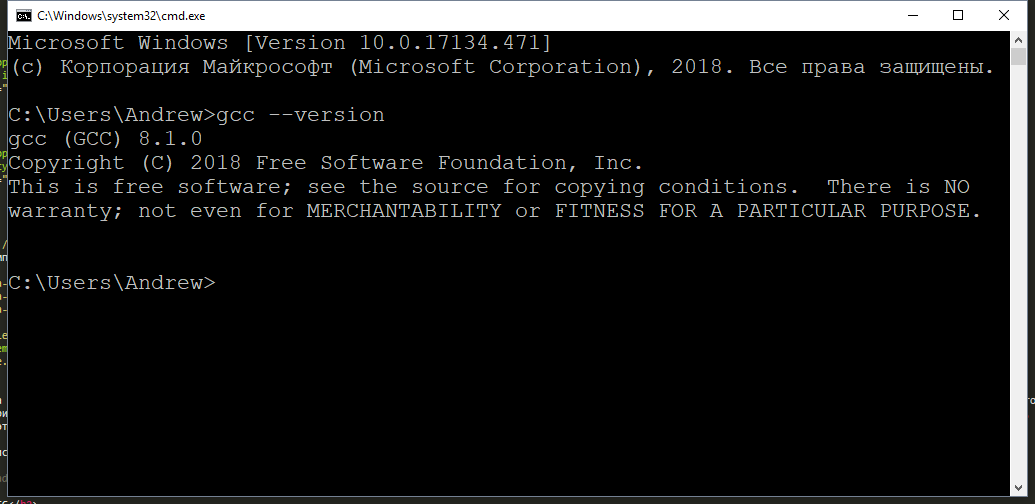
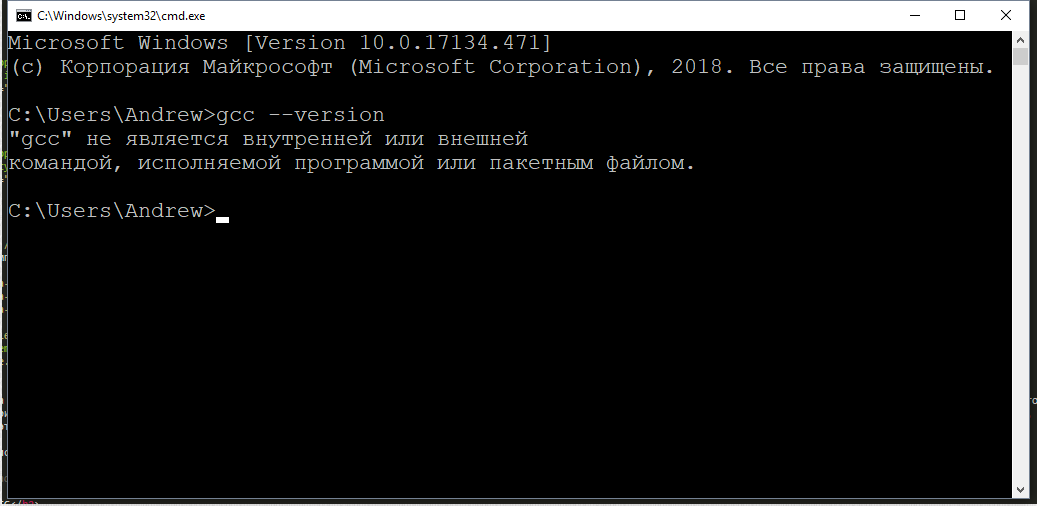
Если в окне консоли появилось сообщение с версией компилятора и другая информация о GCC (второй скриншот), значит компилятор уже установлен и больше дополнительно ничего делать не нужно. А вот если вывод командной строки такой:
— значит GCC ещё не установлен в системе, поэтому двигаемся дальше.

1. Скачиваем установщик компилятора
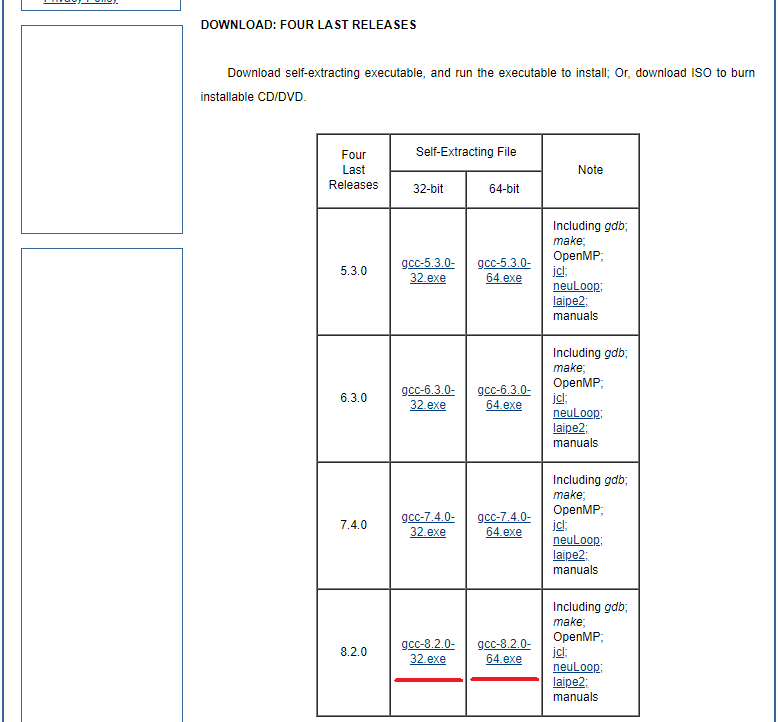
Чтобы поставить GCC на операционную систему Windows, необходимо скачать установочный файл для него. Сделать это можно здесь: equation.com/servlet/equation.cmd?fa=fortran. Найдите в таблице версию компилятора, которая вам больше нравится (мы рекомендуем скачивать самую последнюю, на текущий момент — это версия 8.2.0) и скачайте установщик для вашей системы (32 или 64 бит).
2. Установка GCC
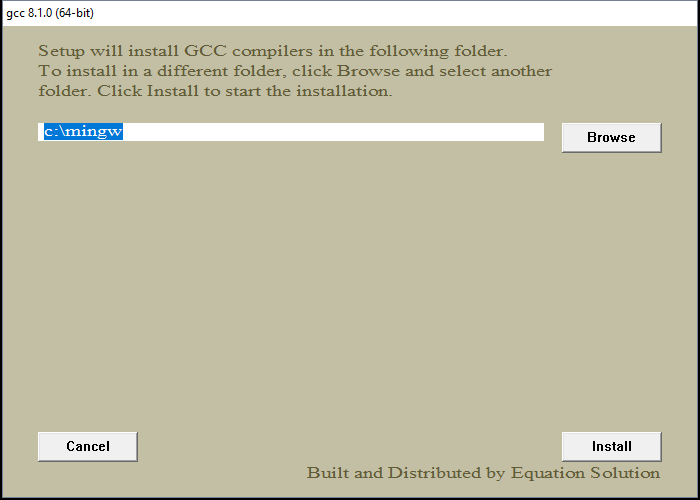
После того, как файл был скачан, откройте в проводнике папку, в которую был скачан установщик и запустите его, кликнув по файлу дважды левой кнопкой мыши. Появится окно, требующее подтверждения действия. В нём нужно выбрать да (иначе ничего ставиться не будет).
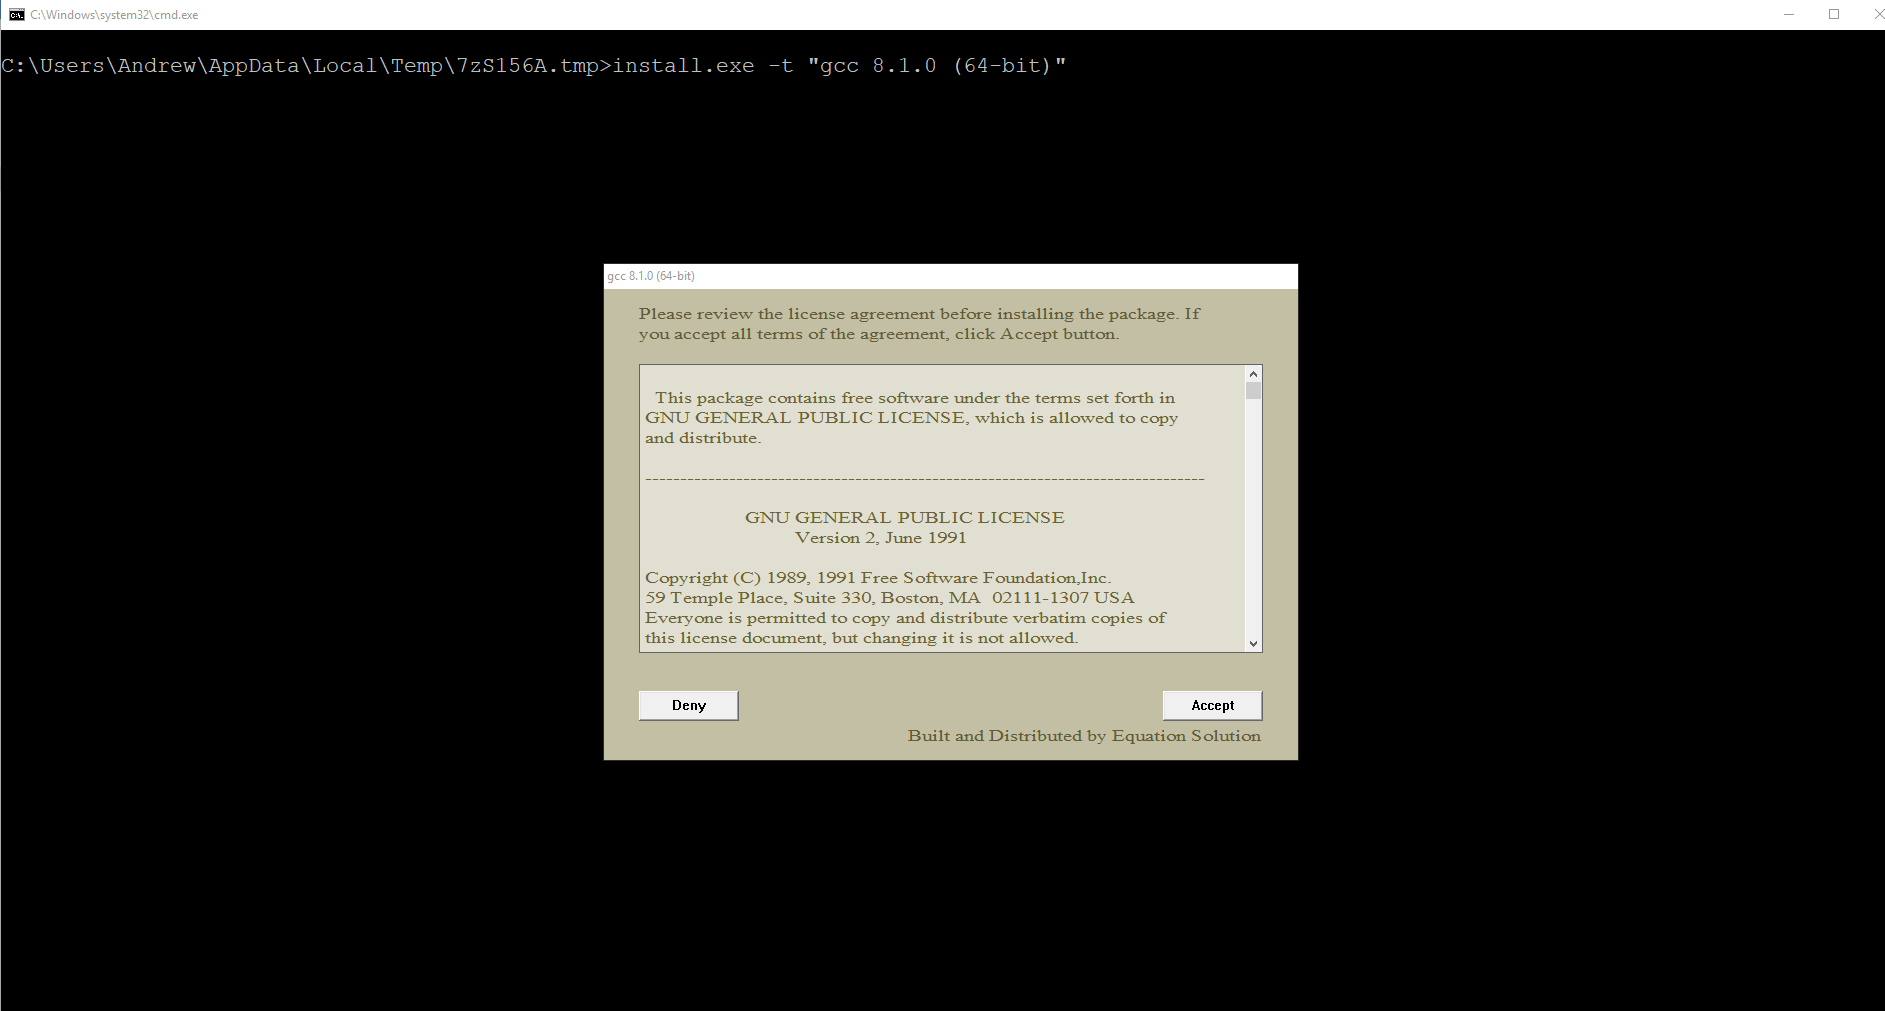
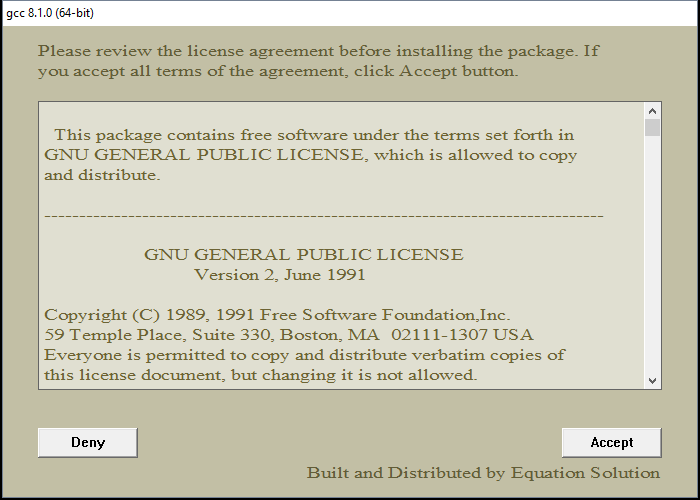
Установщик начнёт работу и отобразит окно с консолью, а также окно с бежевым фоном, в котором попросит прочесть и принять (или отклонить) лицензионное соглашение. Нажимаем Accept.
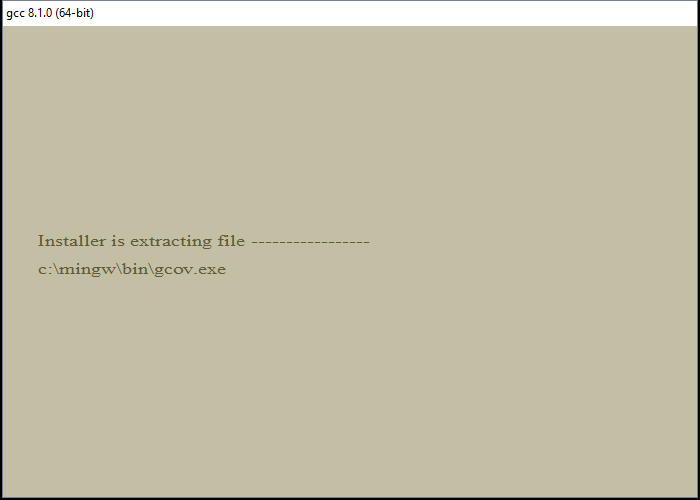
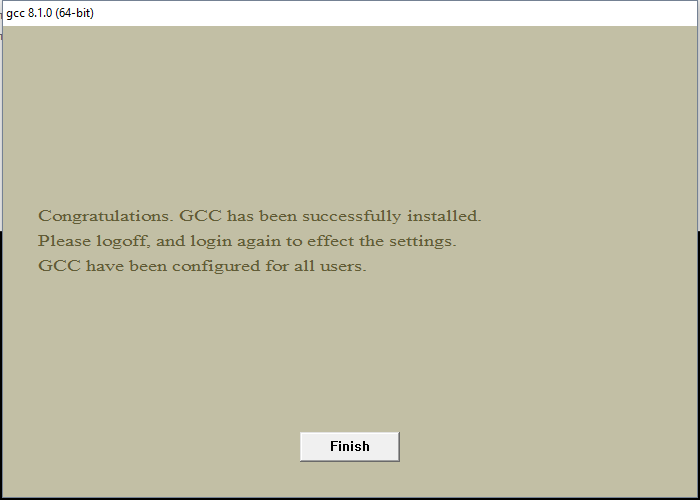
Теперь остаётся только дождаться окончания распаковки архивов и установки их на компьютер. Как только все файлы будут установлены, инсталятор сообщит об этом, после чего нужно будет нажать на кнопку Finish.
3. Проверка установки
Поздравляем! Теперь на вашем компьютере установлен компилятор GCC и вы можете писать программы на языках C и C++, а компилировать их через командную строку!
4. Бонус. Компиляция программ с помощью GCC
Что ещё за a.out? Непонятно!
Используя понятные имена выходных программ (исполняемых файлов), вы гарантируете себе простоту работы и сокращение времени на разбирательство спустя долгое время.

Программист, сооснователь programforyou.ru, в постоянном поиске новых задач и алгоритмов
Языки программирования: Python, C, C++, Pascal, C#, Javascript
Выпускник МГУ им. М.В. Ломоносова
А Вы знаете, что мы пишем программы на C, C++, C#, Pascal и Python?
Так что если Вам нужно написать программу на C/C++, C#, Pascal или Python — мы с радостью поможем с этим!
В том числе мы занимаемся репетиторством по информатике и программированию, а также готовим к ОГЭ и ЕГЭ!
Почему именно мы?
Как с нами связаться?

Programforyou — доверяя нам писать программы, вы получаете качественное решение в короткие сроки по привлекательной цене!
GCC worth using on Windows to replace MSVC?
I currently develop in C++ on Windows, using Visual Studio 2010. After the official announcement of C++11, I have begun to use some of its features that are already available in MSVC. But, as expected, the great majority of the new changes are not supported.
I thought maybe the upcoming version of Visual Studio would add these new features. However, after reading this it looks like very little is going to change.
And so, I’m curious about the feasibility of using GCC on Windows rather than MSVC, as it appears to support the great majority of C++11 already. As far as I can tell, this would mean using MinGW (I haven’t seen any other native Windows versions of GCC). But I have questions about whether this would be worth trying:

7 Answers 7
MSVC has the huge advantage of coming with an IDE that has no equals under Windows, including debugger support.
The probably best alternative for MinGW would be Code::Blocks, but there are worlds in between, especially regarding code completion and the debugger.
Also, MSVC lets you use some proprietary Microsoft stuff (MFC, ATL, and possibly others) that MinGW has no support for, and makes using GDI+ and DirectX easier and more straightforward (though it is possible to do both with MinGW).
Cygwin, as mentioned in another post, will have extra dependencies and possible license issues (the dependency is GPL, so your programs must be, too). MinGW does not have any such dependency or issue.
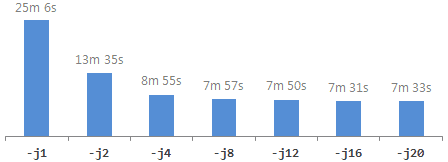
MinGW also compiles significantly slower than MSVC (though precompiled headers help a little).
Despite all that, GCC/MinGW is an entirely reliable quality compiler, which in my opinion outperforms any to date available version of MSVC in terms of quality of generated code.
This is somewhat less pronounced with the most recent versions of MSVC, but still visible. Especially for anything related to SSE, intrinsics, and inline assembly, GCC has been totally anihilating MSVC ever since (though they’re slowly catching up).
Standards compliance is a lot better in GCC too, which can be a double-edged sword (because it can mean that some of your code won’t compile on the more conforming compiler!), as is C++11 support.
MinGW optionally also supports DW2 exceptions, which are totally incompatible with the «normal» flavour and take more space in the executable, but on the positive side are «practically zero cost» in runtime.
How to install the C language GCC compiler on Windows
On Linux, gcc is install by default and you can start to compile and execute C language code almost right away!
That’s not the case on Windows…
I have been struggling with how to do the same thing on Windows 10 for some time, but I finally succeeded
Here’s a video in which I explain the procedure:
Note: The procedure I describe here will not only allow you to install gcc, but also g++, gfortran, and many other useful tools that you usually only get in linux OS (like ls or grep)
1- What I want to teach you here
If you want a simple way to create programs based on C, C++, Fortran, etc… you will have to install a software with can compile the code you write into code that the machine understands
Such program is called a “compiler”
The most well know compiler for C language is the GNU compiler called GCC.
There are actually several compilers which go together like a suite:
Why using the gcc compiler?
If you are on Windows, you probably heard about software such as visual studio from Microsoft which also you to write and compile C and C++ code as well.
That’s true, and it’s totally fine if you want to use it…
I am personally not such a big fan of Visual Studio because of the following reasons:
Because of that, I find that I kind of takes out the fun of programming and seeing immediately the result of what you did…
Now, for large pieces of software, visual studio is probably the way to go
2- How to use the gcc compiler?
Once installed on your machine, gcc is just a piece of cake to use to compile a simple c language code
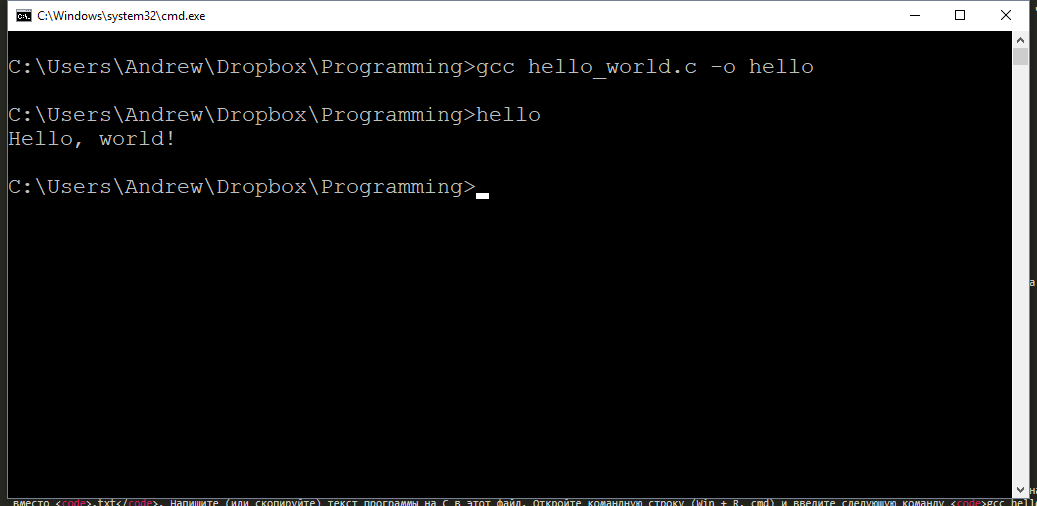
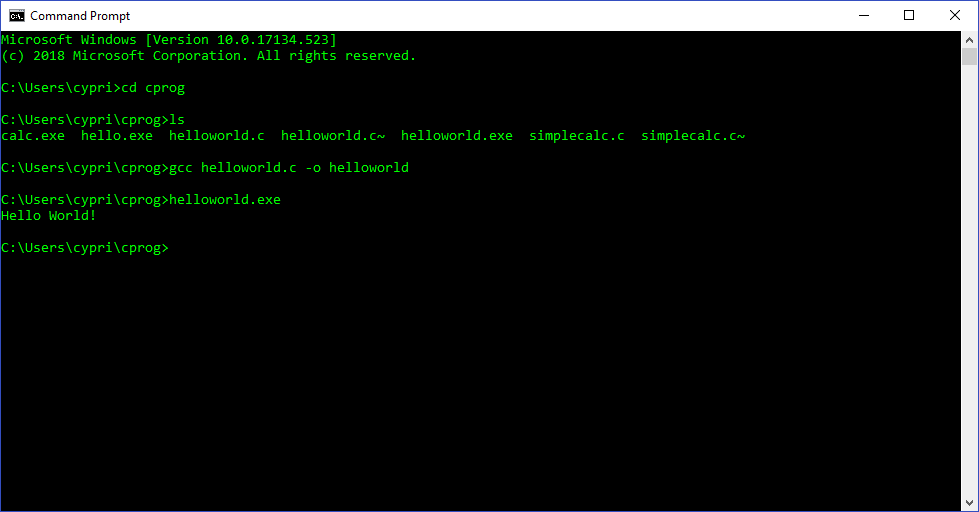
Step 1: Write your c code
For example, let’s take this Hello World example
Step 2: Compile using gcc
Write the following line of code into your terminal:
This will generate an executable binary file called helloworld.exe which can be used to run your code

Step 3: Execute your code
Just go into the directory where your executable is and run it by writing “helloworld.exe”

2- The principle
Now that you understand how it can be easy to start with writing C code, let’s talk about the difficult part…
How to actually install gcc on Windows…
The reason it is easy to install compilers and other kind of open source software on linux is because you have a very powerful command line terminal called bash which handles the installation, uninstallation and upgrade of software using a software called “apt” on debian-based linux systems.
On Windows, if you want to have gcc (and the other compilers too), you have to download the source code and find a way to compile it…
For that, you will need to install first other software called pre-requisites which will also need to be compiled, etc…
You can spend several days trying to do that if you are really motivated
I will present you another way much simplier!
For that I will have to install a software called MSYS2, which is an “easy” way to give some linux feel to your Windows PC and able it to install programs almost as easily as in linux…
You will be able to install gcc just with one command line like this:

3- Installing MSYS2 on your PC
What is MSYS2?
According to their website, MSYS2 is a software distribution and building platform for Windows
The Website: https://www.msys2.org/
Installing it is actually a peace of cake
Just download the correct installer and launch it with admin rights and you are good to go

Expected something more complex?
Once you installed it, you will see 3 programs appear in your list of programs:
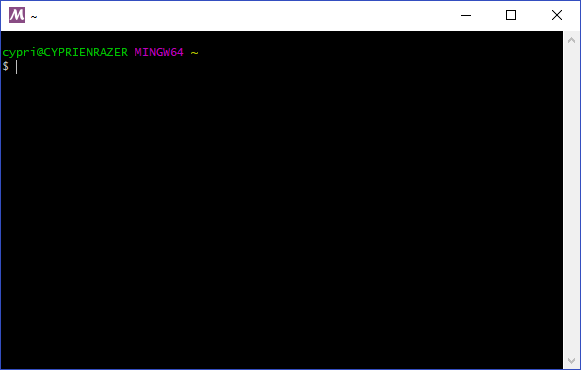
Run the 3rd one MSYS2 MSYS to open a special command window in which you can input commands and start to install programs
The package management system which is equivalent to apt-get on linux is called pacman
When you install MSYS2 for the first time, you have to update pacman using the following command:
4- Installing GCC and other development tools with the pacman package management system
Then you can start to install gcc and other developer tools using pacman like this:
This command will install first a set of development software included in a package called base-devel and then it will install gcc, vim and cmake
vim is optional, but always good to have 😉
(You can also install emacs very easily in the same way)
In the package base-devel, you have 53 useful developement tools that can be installed:
5- Last Important Step: Add Executables to your Windows PATH
Now you are able to install all those packages easily, but how to access them through the normal windows command line?
For that, you have to add the two following directories to your PATH:
To add anything to your PATH in Windows 10:
1- Search “Advanced System Settings” in the search bar
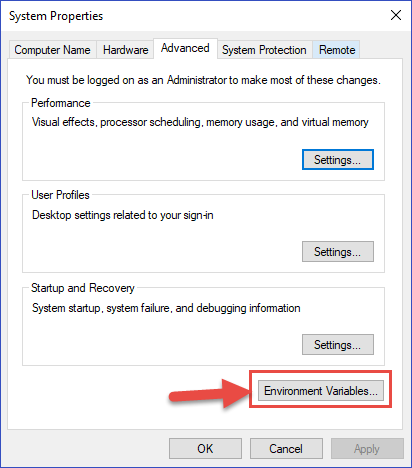
2- Open the “environment variables” window, click on the PATH variable and click on “Edit”

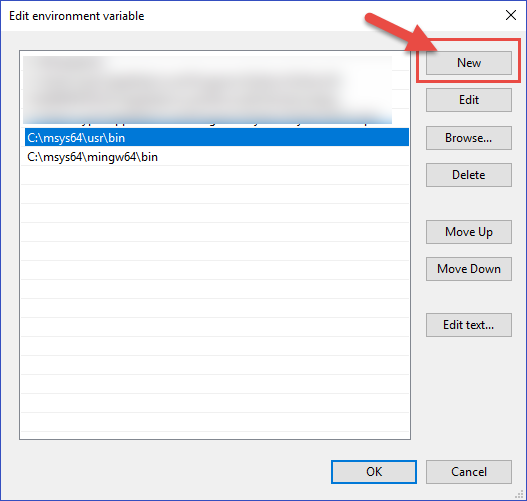
3- Click on the “New” button and add the 2 following directories to your PATH
Important Note: This adds a lot of executables to your path which might conflict with other applications. The usr\bin\ directory contains the whole slew of executables listed above. There is a lot of unnecessary stuff in that directory.
4- Click on OK on all the windows and open a new Command Window and you will be able to use gcc into your windows command prompt!
That’s all for today, hope you understand better now how to install and use GCC and other linux tools on windows!
I will write new articles soon about how to develop simple programs in C.
Let me know through the comments if there is something special that you want to understand!

PS: If you like what I write, subscribe to the newsletter and help me to spread the knowledge by sharing this article! We all win by learning from each other and making the engineering knowledge more accessible 🙂 THANK YOU!
 Preshing on Programming
 Preshing on Programming
Several modern C++ features are currently missing from Visual Studio Express, and from the system GCC compiler provided with many of today’s Linux distributions. Generic lambdas – also known as polymorphic lambdas – are one such feature. This feature is, however, available in the latest versions of GCC and Clang.
The following guide will help you install the latest GCC on Windows, so you can experiment with generic lambdas and other cutting-edge C++ features. You’ll need to compile GCC from sources, but that’s not a problem. Depending on the speed of your machine, you can have the latest GCC up and running in as little as 15 minutes.
[Update: As a commenter points out, you can also install native GCC compilers from the MinGW-w64 project without needing Cygwin.]
1. Install Cygwin
First, download and run either the 32- or 64-bit version of the Cygwin installer, depending on your version of Windows. Cygwin’s setup wizard will walk you through a series of steps. If your machine is located behind a proxy server, make sure to check “Use Internet Explorer Proxy Settings” when you get to the “Select Your Internet Connection” step.
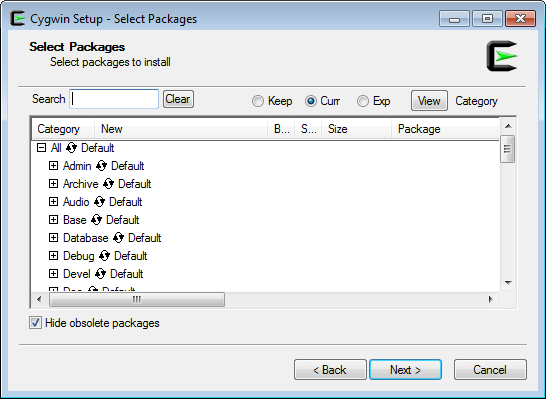
When you reach the “Select Packages” step (shown below), don’t bother selecting any packages yet. Just go ahead and click Next. We’ll add additional packages from the command line later.
If you already have Cygwin installed, it’s a good idea to re-run the installer to make sure it has the latest available packages. Alternatively, you can install a new instance of Cygwin in a different folder.
2. Install Required Cygwin Packages
Next, you’ll need to add several packages to Cygwin. You can add them all in one fell swoop. Just open a Command Prompt (in Windows), navigate to the folder where the Cygwin installer is located, and run the following command:
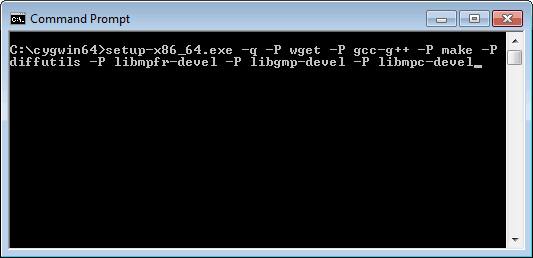
A window will pop up and download all the required packages along with their dependencies.
At this point, you now have a working GCC compiler on your system. It’s not the latest version of GCC; it’s whatever version the Cygwin maintainers chose as their system compiler. At the time of writing, that’s GCC 4.8.3. To get a more recent version of GCC, you’ll have to compile it yourself, using the GCC compiler you already have.
3. Download, Build and Install the Latest GCC
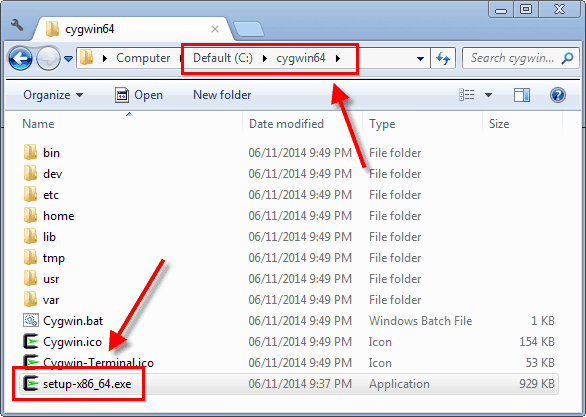
Open a Cygwin terminal, either from the Start menu or by running Cygwin.bat from the Cygwin installation folder.
If your machine is located behind a proxy server, you must run the following command from the Cygwin terminal before proceeding – otherwise, wget won’t work. This step is not needed if your machine is directly connected to the Internet.
To download and extract the latest GCC source code, enter the following commands in the Cygwin terminal. If you’re following this guide at a later date, there will surely be a more recent version of GCC available. I used 4.9.2, but you can use any version you like. Keep in mind, though, that it’s always best to have the latest Cygwin packages installed when building the latest GCC. Be patient with the tar command; it takes several minutes.
Here’s a description of the command-line options passed to configure :
We’re not going to build a new Binutils, which GCC relies on, because the existing Binutils provided by Cygwin is already quite recent. We’re also skipping a couple of packages, namely ISL and CLooG, which means that the new compiler won’t be able to use any of the Graphite loop optimizations.
Next, we’ll actually build the new GCC compiler suite, including C, C++ and the standard C++ library. This is the longest step.
Once that’s finished, install the new compiler:
If, later, you decide to uninstall the new GCC compiler, you have several options:
4. Test the New Compiler
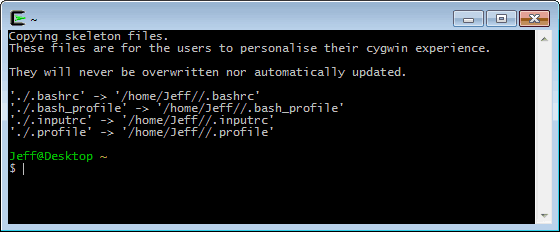
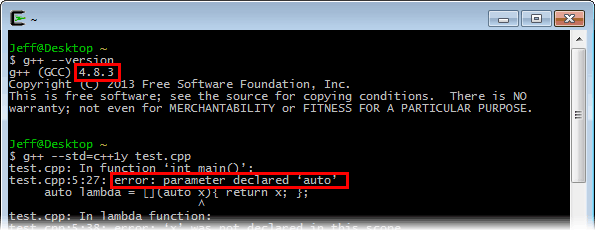
All right, let’s compile some code that uses generic lambdas! Generic lambdas are part of the C++14 standard. They let you pass arguments to lambda functions as auto (or any templated type), like the one highlighted below. Create a file named test.cpp with the following contents:
You can add files to your home directory in Cygwin using any Windows-based text editor; just save them to the folder C:\cygwin64\home\Jeff (or similar) in Windows.
First, let’s see what happens when we try to compile it using the system GCC compiler provided by Cygwin:
If the system compiler version is less than 4.9, compilation will fail:

Check out Plywood, a cross-platform, open source C++ framework:
Recent Posts
Using GCC with MinGW
In this tutorial, you configure Visual Studio Code to use the GCC C++ compiler (g++) and GDB debugger from mingw-w64 to create programs that run on Windows.
After configuring VS Code, you will compile and debug a simple Hello World program in VS Code. This tutorial does not teach you about GCC, GDB, Mingw-w64, or the C++ language. For those subjects, there are many good resources available on the Web.
If you have any problems, feel free to file an issue for this tutorial in the VS Code documentation repository.
Prerequisites
To successfully complete this tutorial, you must do the following steps:
Install the C/C++ extension for VS Code. You can install the C/C++ extension by searching for ‘c++’ in the Extensions view ( ⇧⌘X (Windows, Linux Ctrl+Shift+X ) ).

Install Mingw-w64 via the SourceForge website. Click Mingw-w64 to download the Windows Mingw-w64 installer.
Add the path to your Mingw-w64 bin folder to the Windows PATH environment variable by using the following steps:
Check your MinGW installation
To check that your Mingw-w64 tools are correctly installed and available, open a new Command Prompt and type:
If you don’t see the expected output or g++ or gdb is not a recognized command, check your installation (Windows Control Panel > Programs) and make sure your PATH entry matches the Mingw-w64 binary location where the compilers are located.
Create Hello World
Add a source code file
Add hello world source code
Now paste in this source code:
Now press ⌘S (Windows, Linux Ctrl+S ) to save the file. Notice how the file you just added appears in the File Explorer view ( ⇧⌘E (Windows, Linux Ctrl+Shift+E ) ) in the side bar of VS Code:

You can also enable Auto Save to automatically save your file changes, by checking Auto Save in the main File menu.
The Activity Bar on the far left lets you open different views such as Search, Source Control, and Run. You’ll look at the Run view later in this tutorial. You can find out more about the other views in the VS Code User Interface documentation.
Note: When you save or open a C++ file, you may see a notification from the C/C++ extension about the availability of an Insiders version, which lets you test new features and fixes. You can ignore this notification by selecting the X (Clear Notification).
Explore IntelliSense
In your new helloworld.cpp file, hover over vector or string to see type information. After the declaration of the msg variable, start typing msg. as you would when calling a member function. You should immediately see a completion list that shows all the member functions, and a window that shows the type information for the msg object:
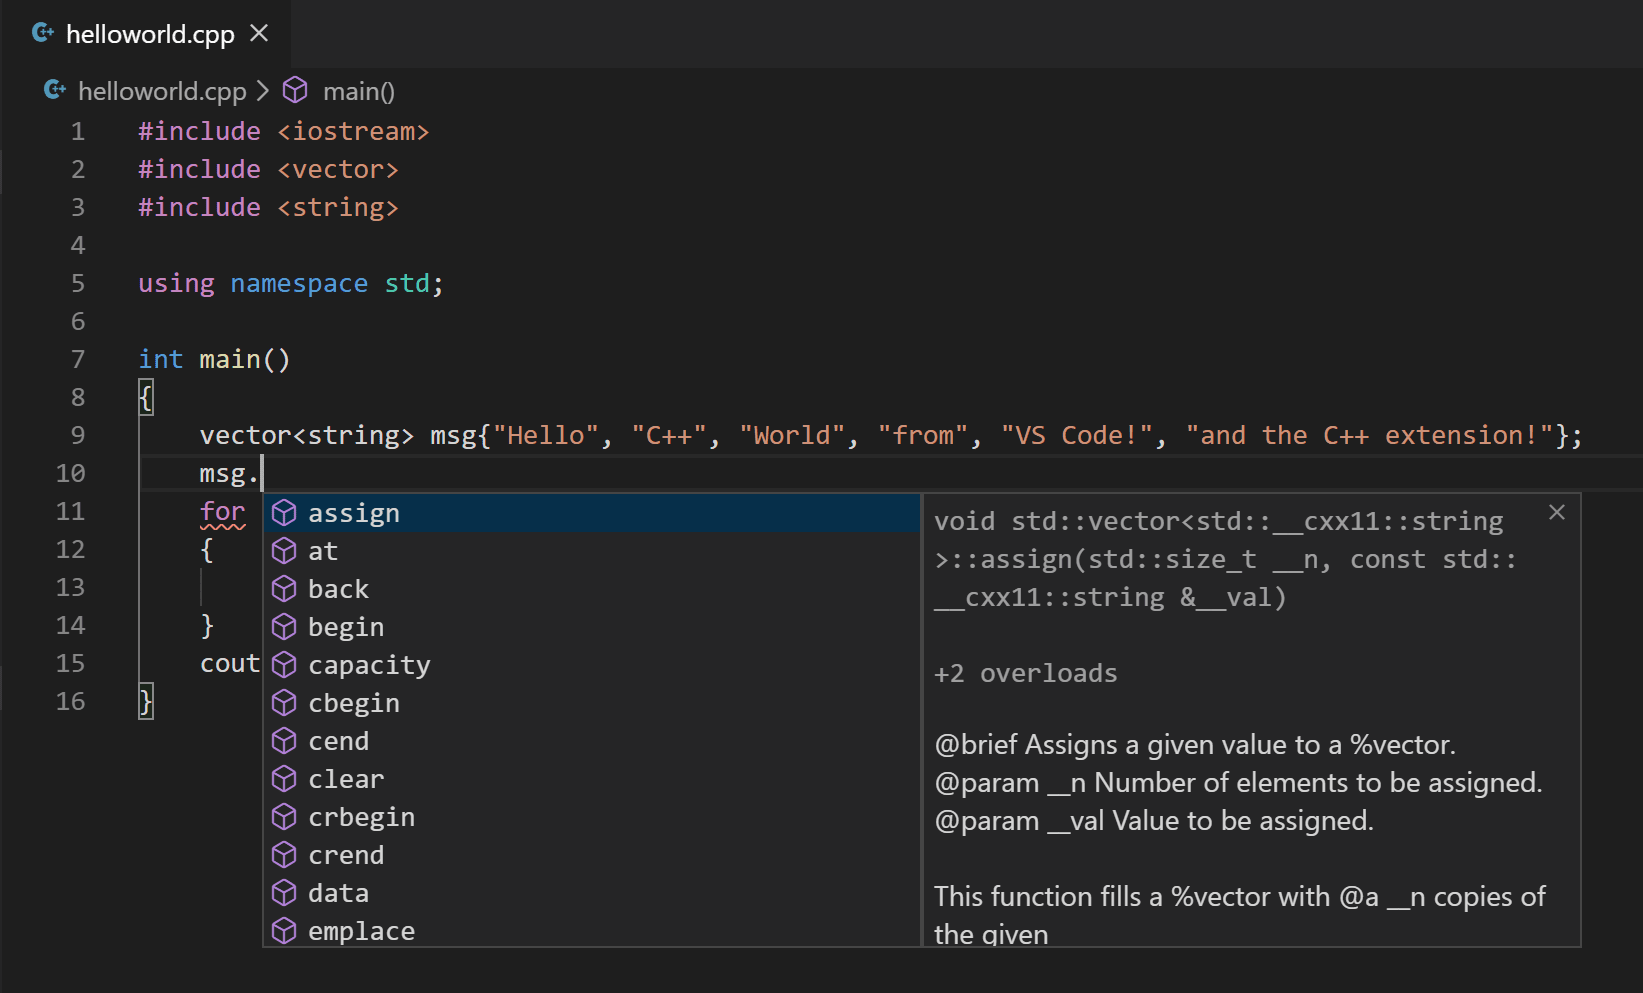
You can press the Tab key to insert the selected member; then, when you add the opening parenthesis, you will see information about any arguments that the function requires.
Build helloworld.cpp
Next, you’ll create a tasks.json file to tell VS Code how to build (compile) the program. This task will invoke the g++ compiler to create an executable file based on the source code.
From the main menu, choose Terminal > Configure Default Build Task. In the dropdown, which will display a tasks dropdown listing various predefined build tasks for C++ compilers. Choose g++.exe build active file, which will build the file that is currently displayed (active) in the editor.

Your new tasks.json file should look similar to the JSON below:
Note: You can learn more about tasks.json variables in the variables reference.
The label value is what you will see in the tasks list; you can name this whatever you like.
Running the build
When the task starts, you should see the Integrated Terminal panel appear below the source code editor. After the task completes, the terminal shows output from the compiler that indicates whether the build succeeded or failed. For a successful g++ build, the output looks something like this:


Note: You might need to press Enter a couple of times initially to see the PowerShell prompt in the terminal. This issue should be fixed in a future release of Windows.
Modifying tasks.json
Debug helloworld.cpp
Next, you’ll create a launch.json file to configure VS Code to launch the GDB debugger when you press F5 to debug the program.

VS Code creates a launch.json file, opens it in the editor, and builds and runs ‘helloworld’.
Change the stopAtEntry value to true to cause the debugger to stop on the main method when you start debugging.
Note: The preLaunchTask setting is used to specify task to be executed before launch. Make sure it is consistent with the tasks.json file label setting.
Start a debugging session
The Integrated Terminal appears at the bottom of the source code editor. In the Debug Output tab, you see output that indicates the debugger is up and running.
The editor highlights the first statement in the main method. This is a breakpoint that the C++ extension automatically sets for you:

The Run view on the left shows debugging information. You’ll see an example later in the tutorial.
At the top of the code editor, a debugging control panel appears. You can move this around the screen by grabbing the dots on the left side.
Step through the code
Now you’re ready to start stepping through the code.
Click or press the Step over icon in the debugging control panel.
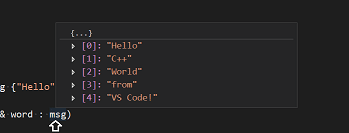
This will advance program execution to the first line of the for loop, and skip over all the internal function calls within the vector and string classes that are invoked when the msg variable is created and initialized. Notice the change in the Variables window on the left.
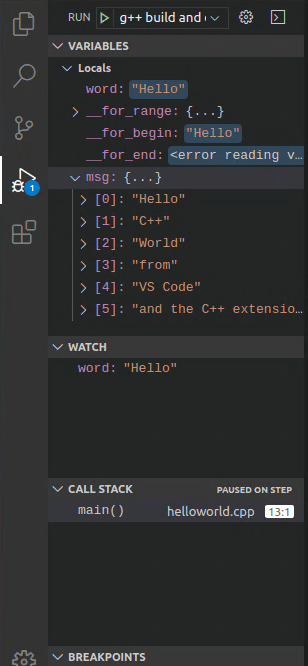
In this case, the errors are expected because, although the variable names for the loop are now visible to the debugger, the statement has not executed yet, so there is nothing to read at this point. The contents of msg are visible, however, because that statement has completed.
Press Step over again to advance to the next statement in this program (skipping over all the internal code that is executed to initialize the loop). Now, the Variables window shows information about the loop variables.
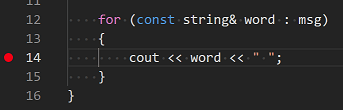
Press Step over again to execute the cout statement. (Note that as of the March 2019 release, the C++ extension does not print any output to the Debug Console until the loop exits.)
If you like, you can keep pressing Step over until all the words in the vector have been printed to the console. But if you are curious, try pressing the Step Into button to step through source code in the C++ standard library!
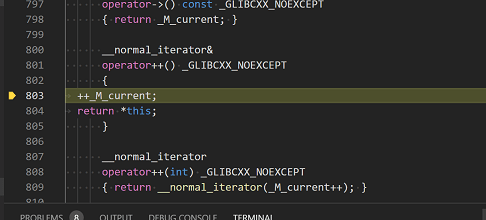
When the loop has completed, you can see the output in the Integrated Terminal, along with some other diagnostic information that is output by GDB.

Set a watch
Sometimes you might want to keep track of the value of a variable as your program executes. You can do this by setting a watch on the variable.
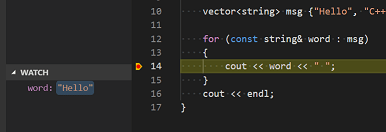
To quickly view the value of any variable while execution is paused on a breakpoint, you can hover over it with the mouse pointer.
C/C++ configurations
If you want more control over the C/C++ extension, you can create a c_cpp_properties.json file, which will allow you to change settings such as the path to the compiler, include paths, C++ standard (default is C++17), and more.
You can view the C/C++ configuration UI by running the command C/C++: Edit Configurations (UI) from the Command Palette ( ⇧⌘P (Windows, Linux Ctrl+Shift+P ) ).

Here, we’ve changed the Configuration name to GCC, set the Compiler path dropdown to the g++ compiler, and the IntelliSense mode to match the compiler (gcc-x64)

You only need to add to the Include path array setting if your program includes header files that are not in your workspace or in the standard library path.
Compiler path
The extension uses the compilerPath setting to infer the path to the C++ standard library header files. When the extension knows where to find those files, it can provide features like smart completions and Go to Definition navigation.
The C/C++ extension attempts to populate compilerPath with the default compiler location based on what it finds on your system. The extension looks in several common compiler locations.
The compilerPath search order is:


